Squarespace: How to Use Manage Custom Files
If you’ve used Wordpress, you’re probably very familiar with the media library and uploading images to it in order to use them on your site. If you’re not familiar, media libraries house images for use on your website (when you don't want to place the image on a page) and provide a unique location (web address) for each image that can then be called on to load the photo in its desired location.
Squarespace isn’t set up with a Wordpress-like media library. Instead we have the Manage Custom Files option in the Custom CSS window. Once you get the hang of how to use it, you can do things all sorts of creative things like adding hidden images for pinning to Pinterest or creating hover effects for images on your site.
Before getting started, I’d recommend getting your images organized and optimized for web use.
Here's How to Use Manage Custom Files in Squarespace
After logging into your Squarespace website, from the home screen, go to Design>Custom CSS.
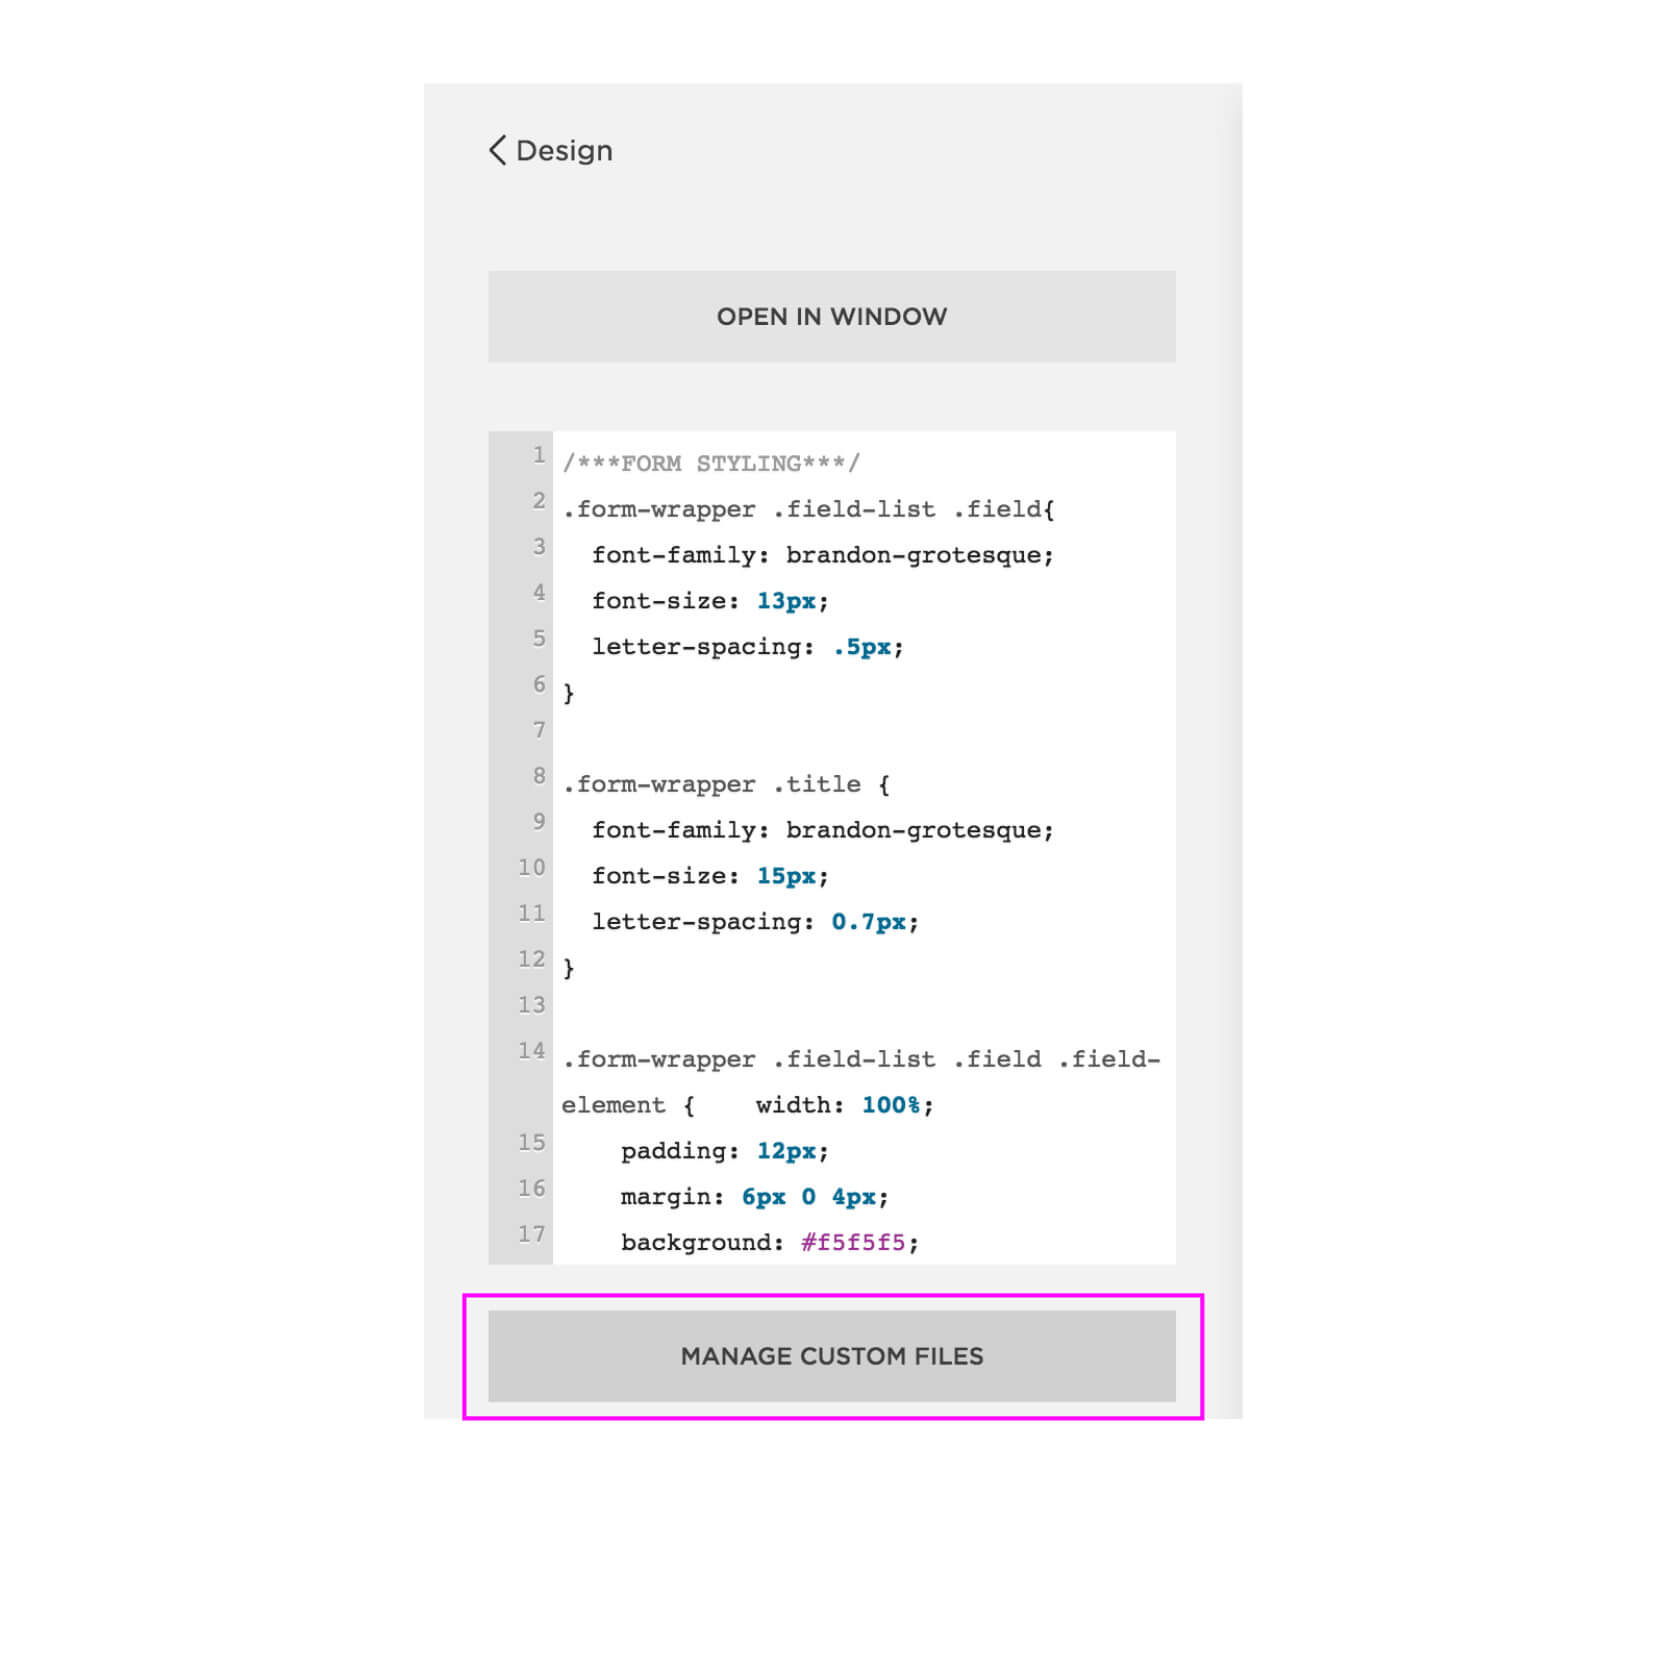
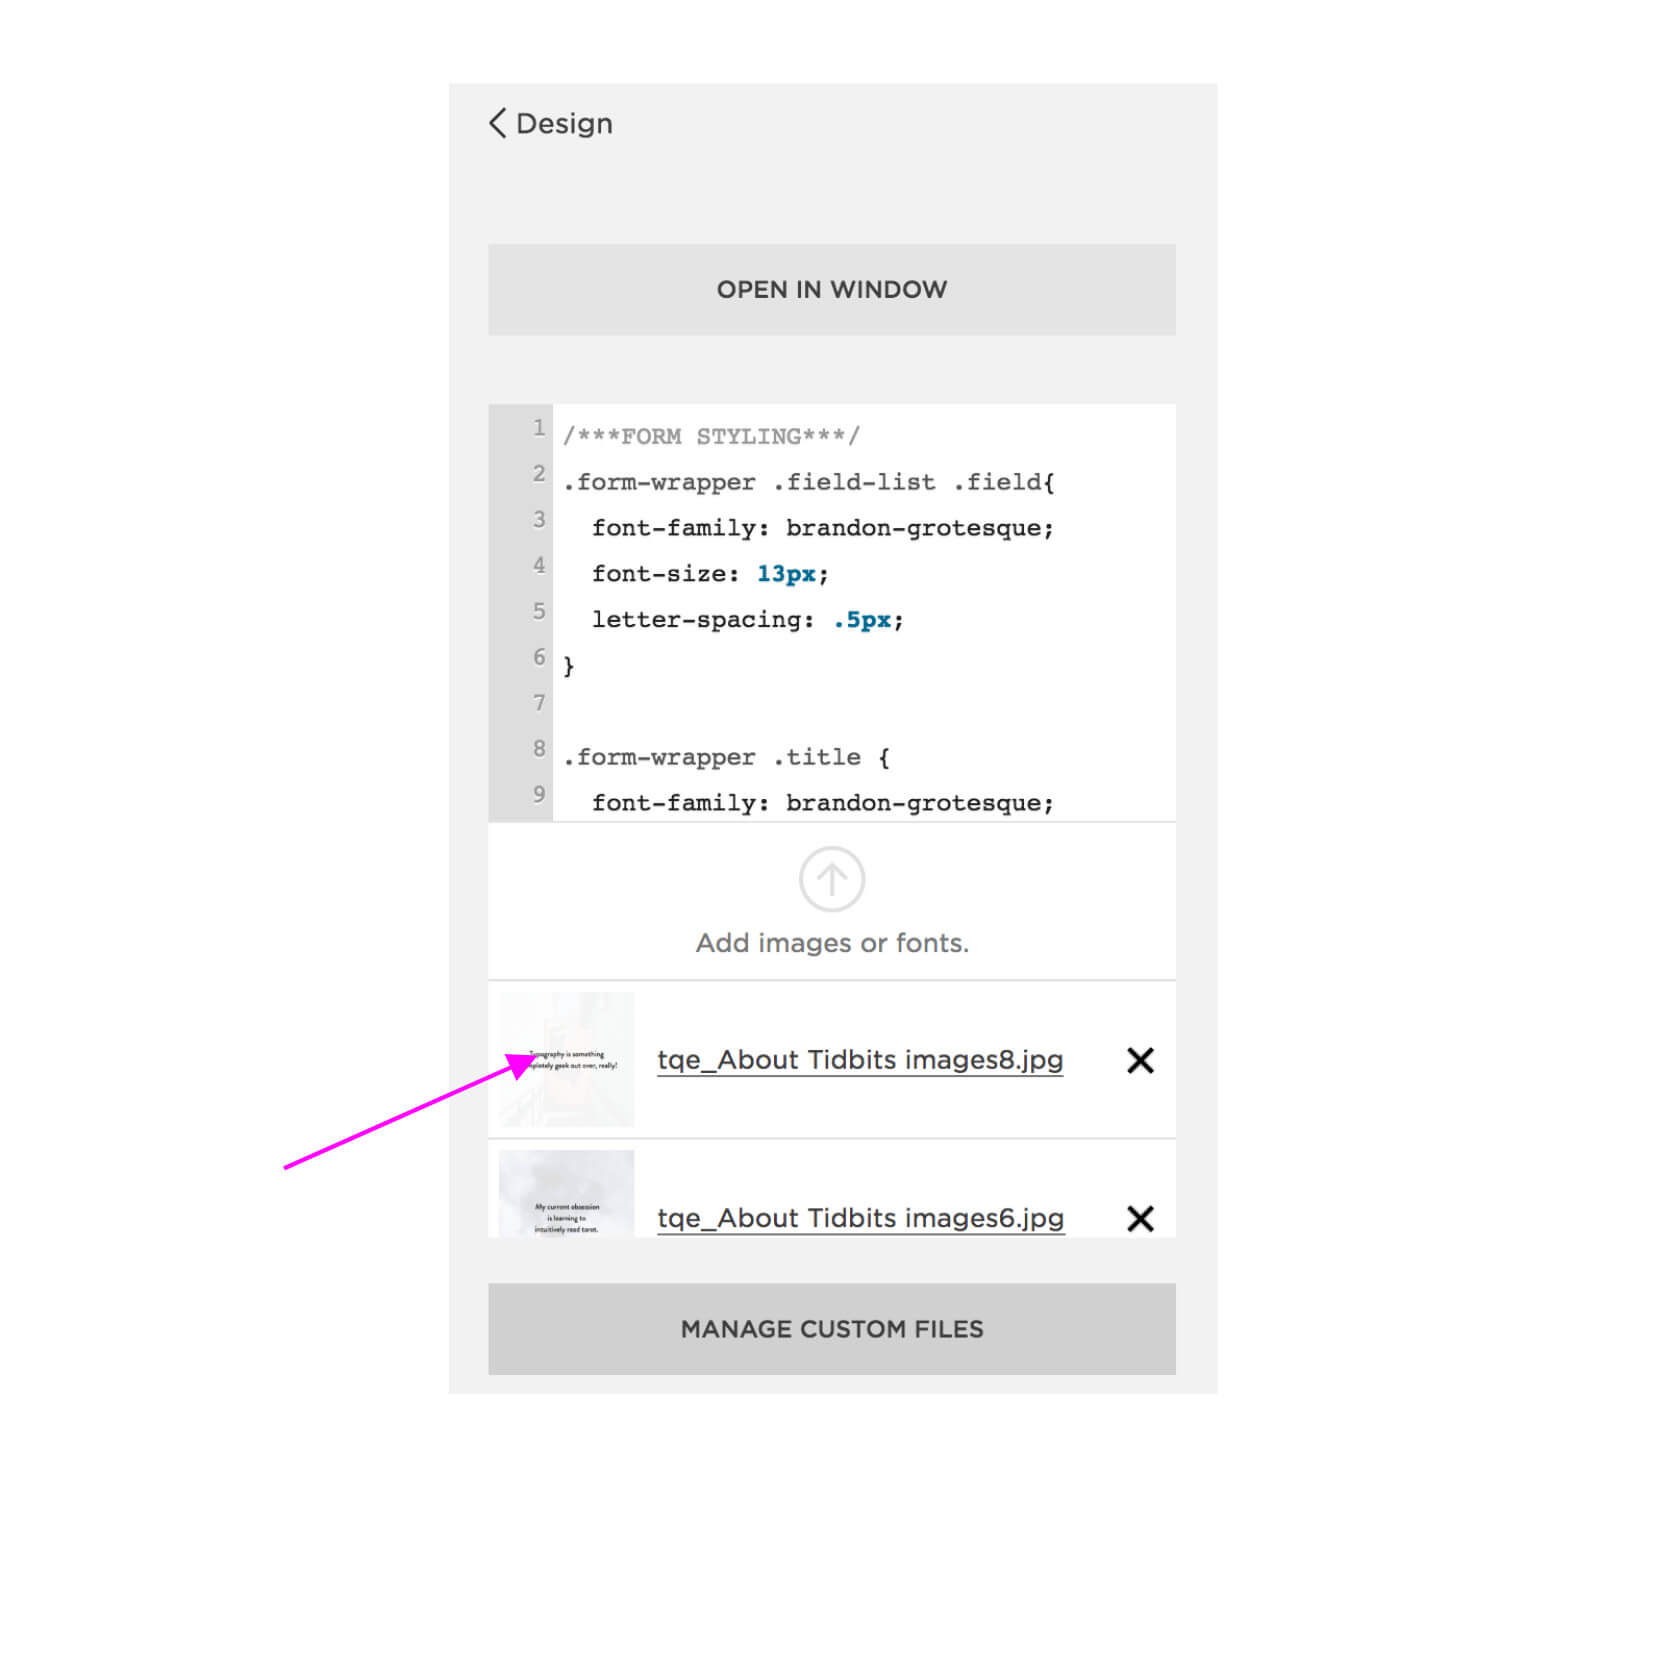
At the bottom of the Custom CSS menu on the left is a button called Manage Custom Files, click that button.
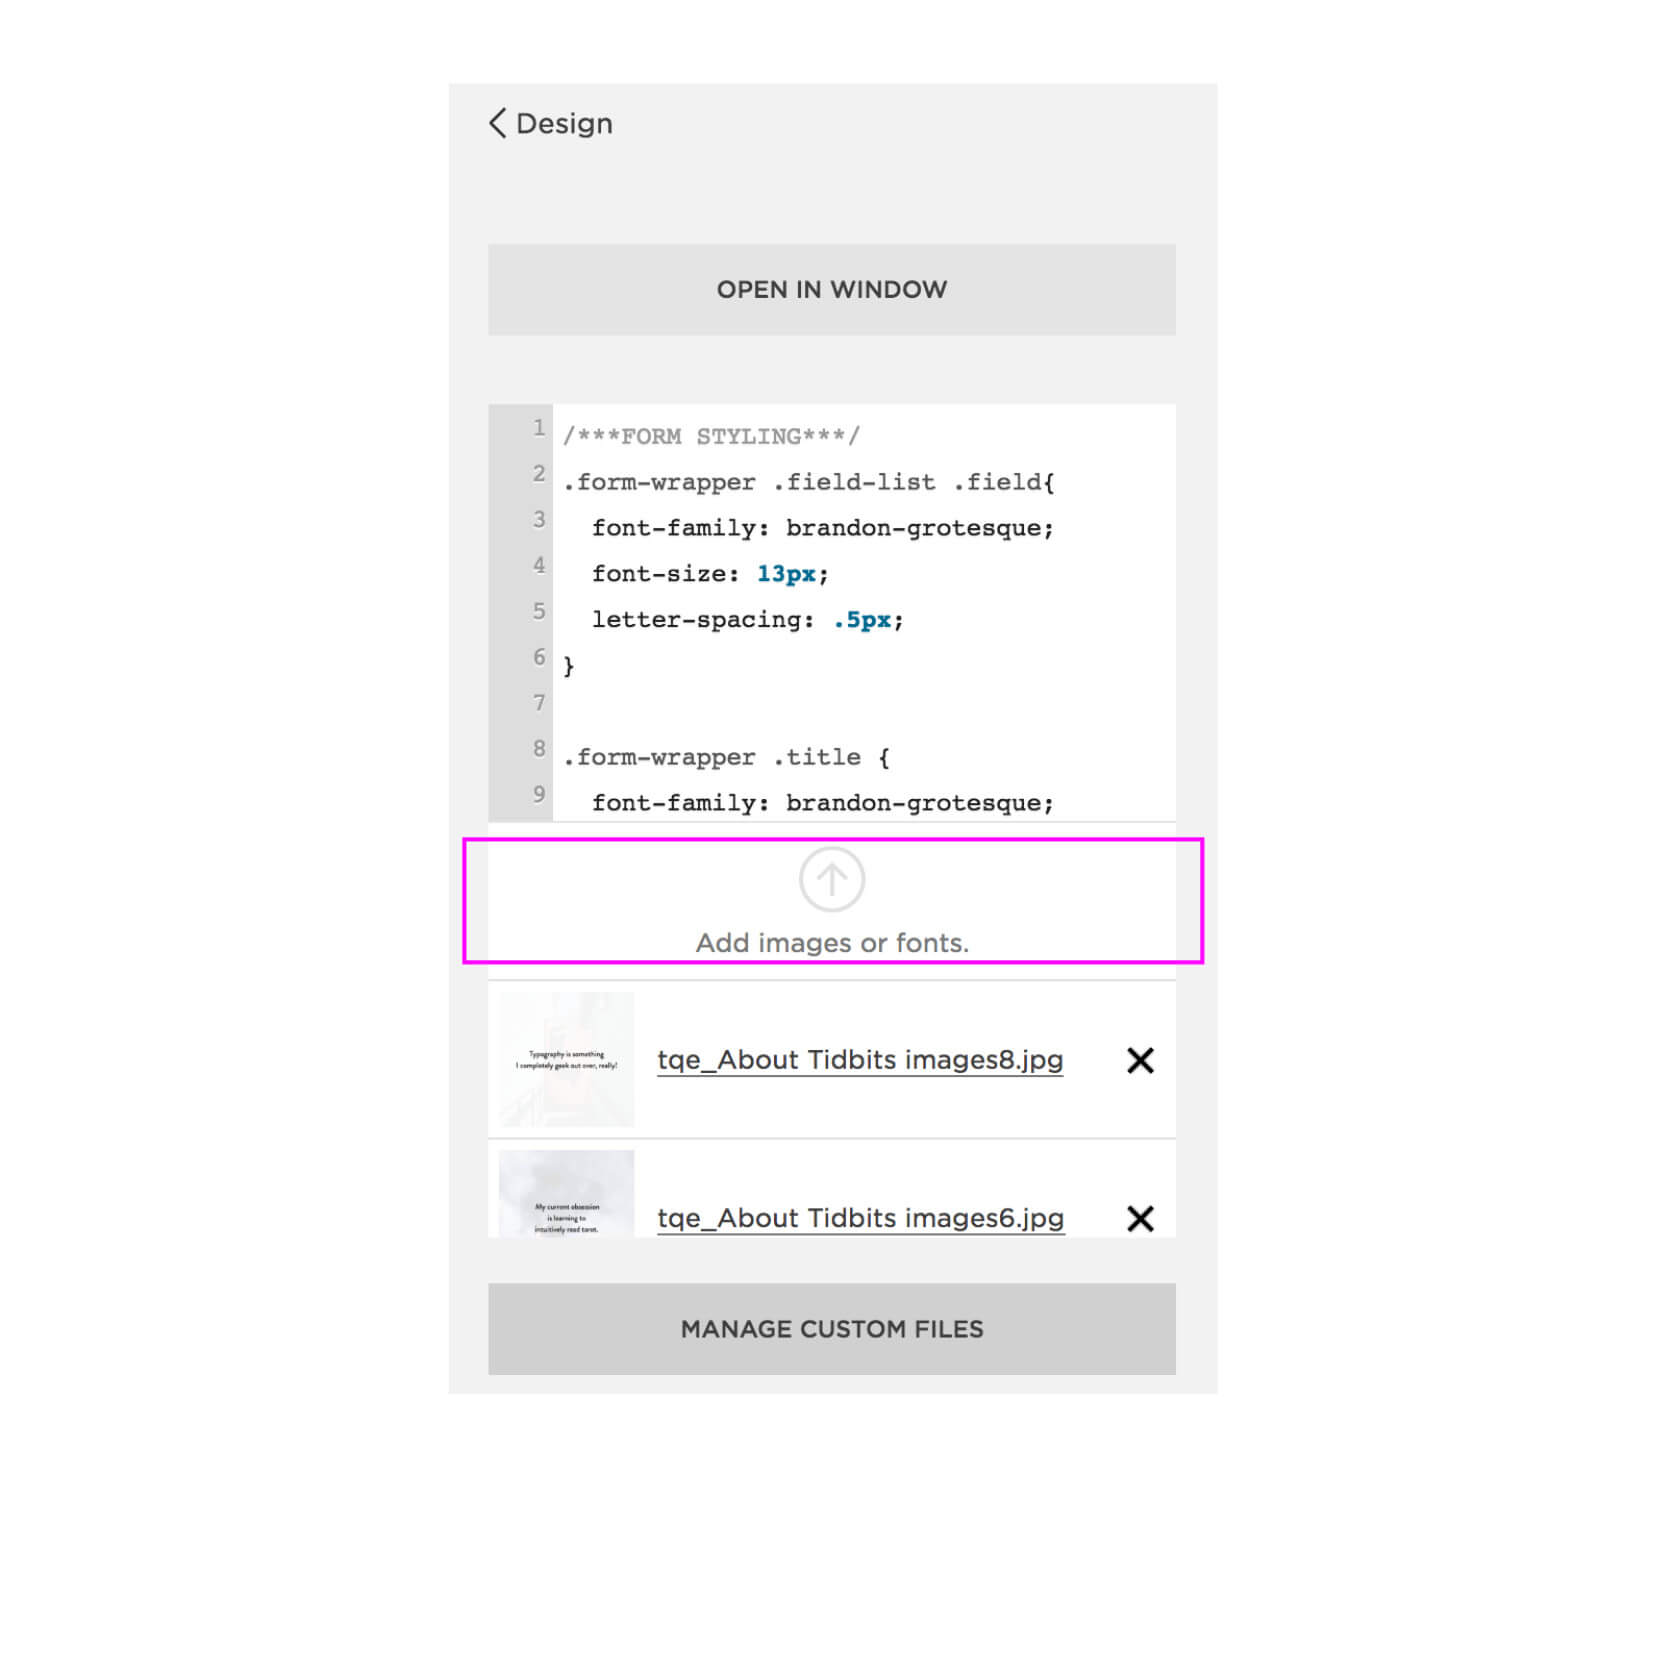
When the menu opens, click on Add images or fonts.
You’ll be prompted to navigate to the image you want to add from your computer. Once you select the image, click Open and your image will be uploaded to your site. (You can only upload one image at a time.)
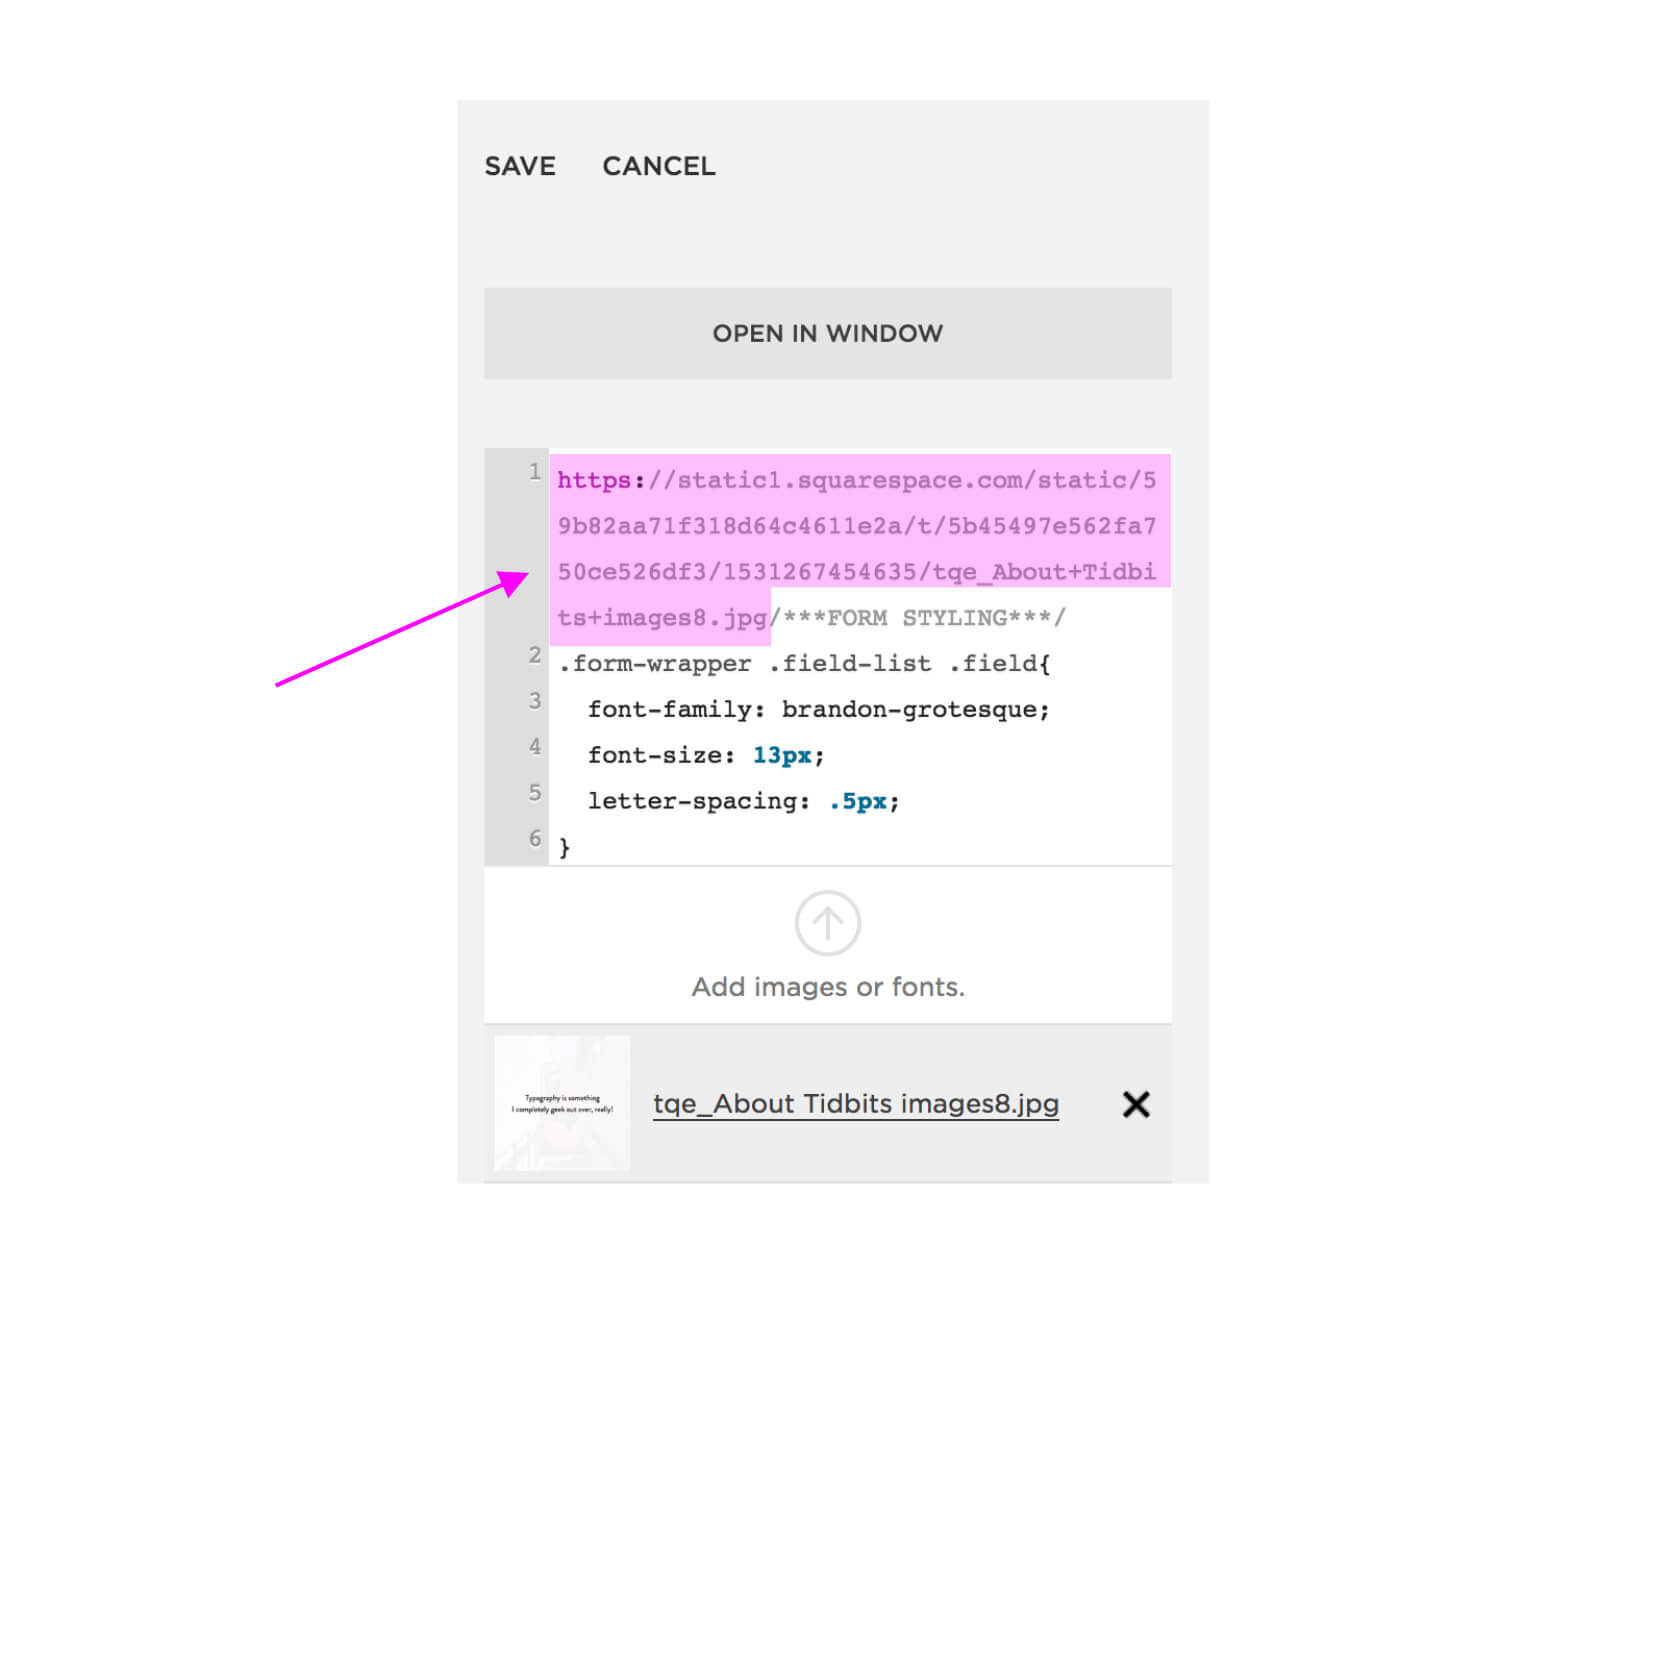
Once you see the image appear in the window, click the image within the menu and it’s URL/address will appear at the top of your Custom CSS window (you may need to scroll to the top of the window).
Open your text editor or a Word doc so you can save the image’s web address.
Cut the address and paste it into the text doc so you can use it in the code you’ll be adding to your page where you’d like the image to appear. In the image below, the image URL (web address) is highlighted in pink below. It starts with https: and ends with .jpg. Make sure you delete the image address from your Custom CSS window so it’s not left in the code.
Repeat the process for any other images you’d like to use.
Example of how you can use images uploaded via Manage Custom Files
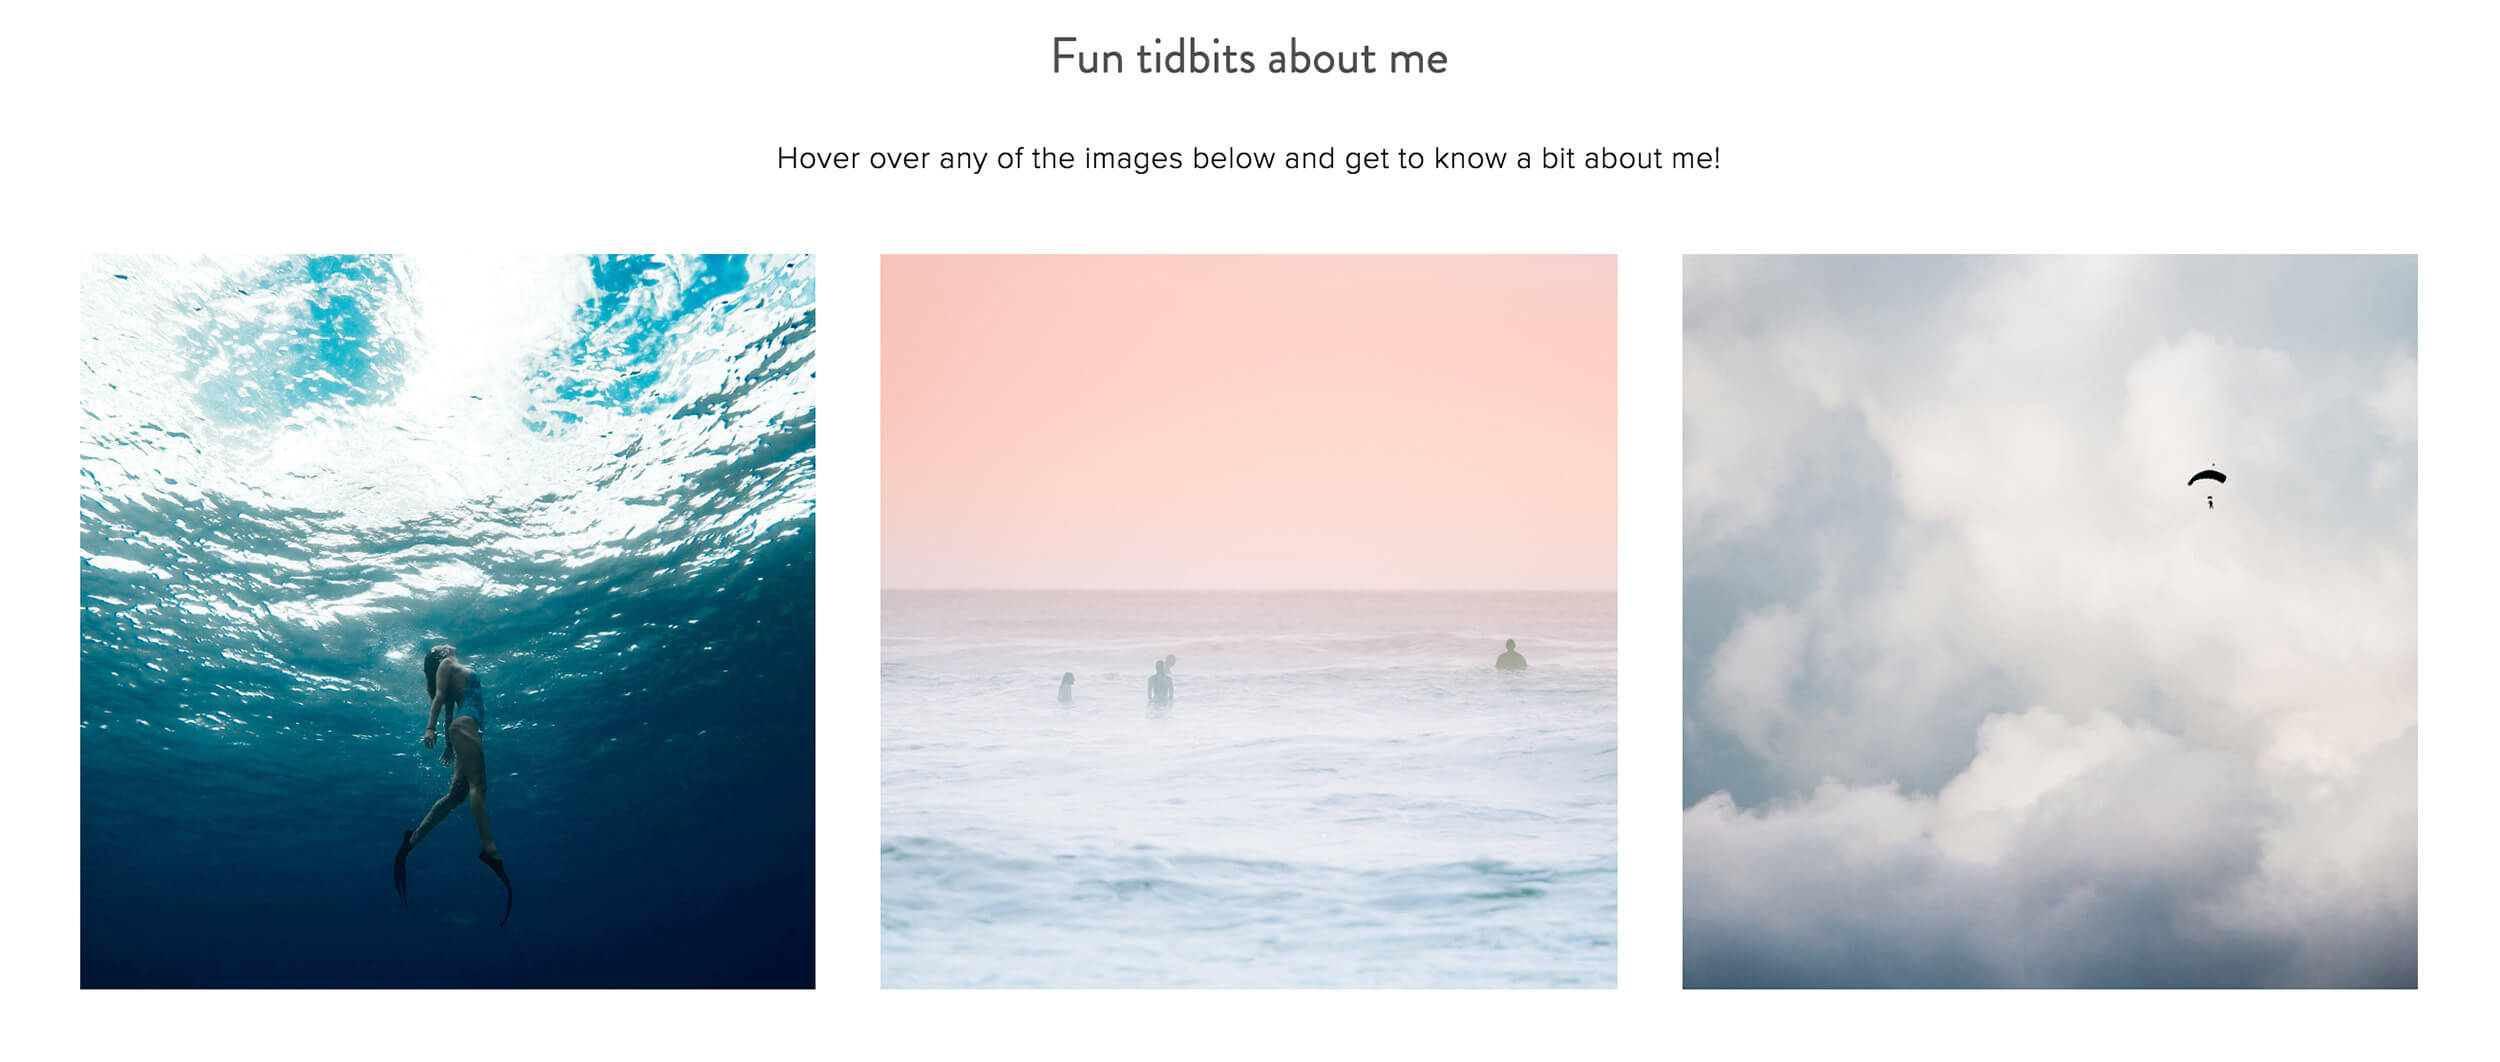
Now that you’ve got the addresses, you can then use the images creatively on your Squarespace website. On my About page, I use images with hover effects to share fun tidbits about myself. Much more interesting and engaging than a boring old text list, wouldn't you agree?! You can check it out for yourself here!
INITIAL VIEW OF IMAGES BEFORE HOVERING
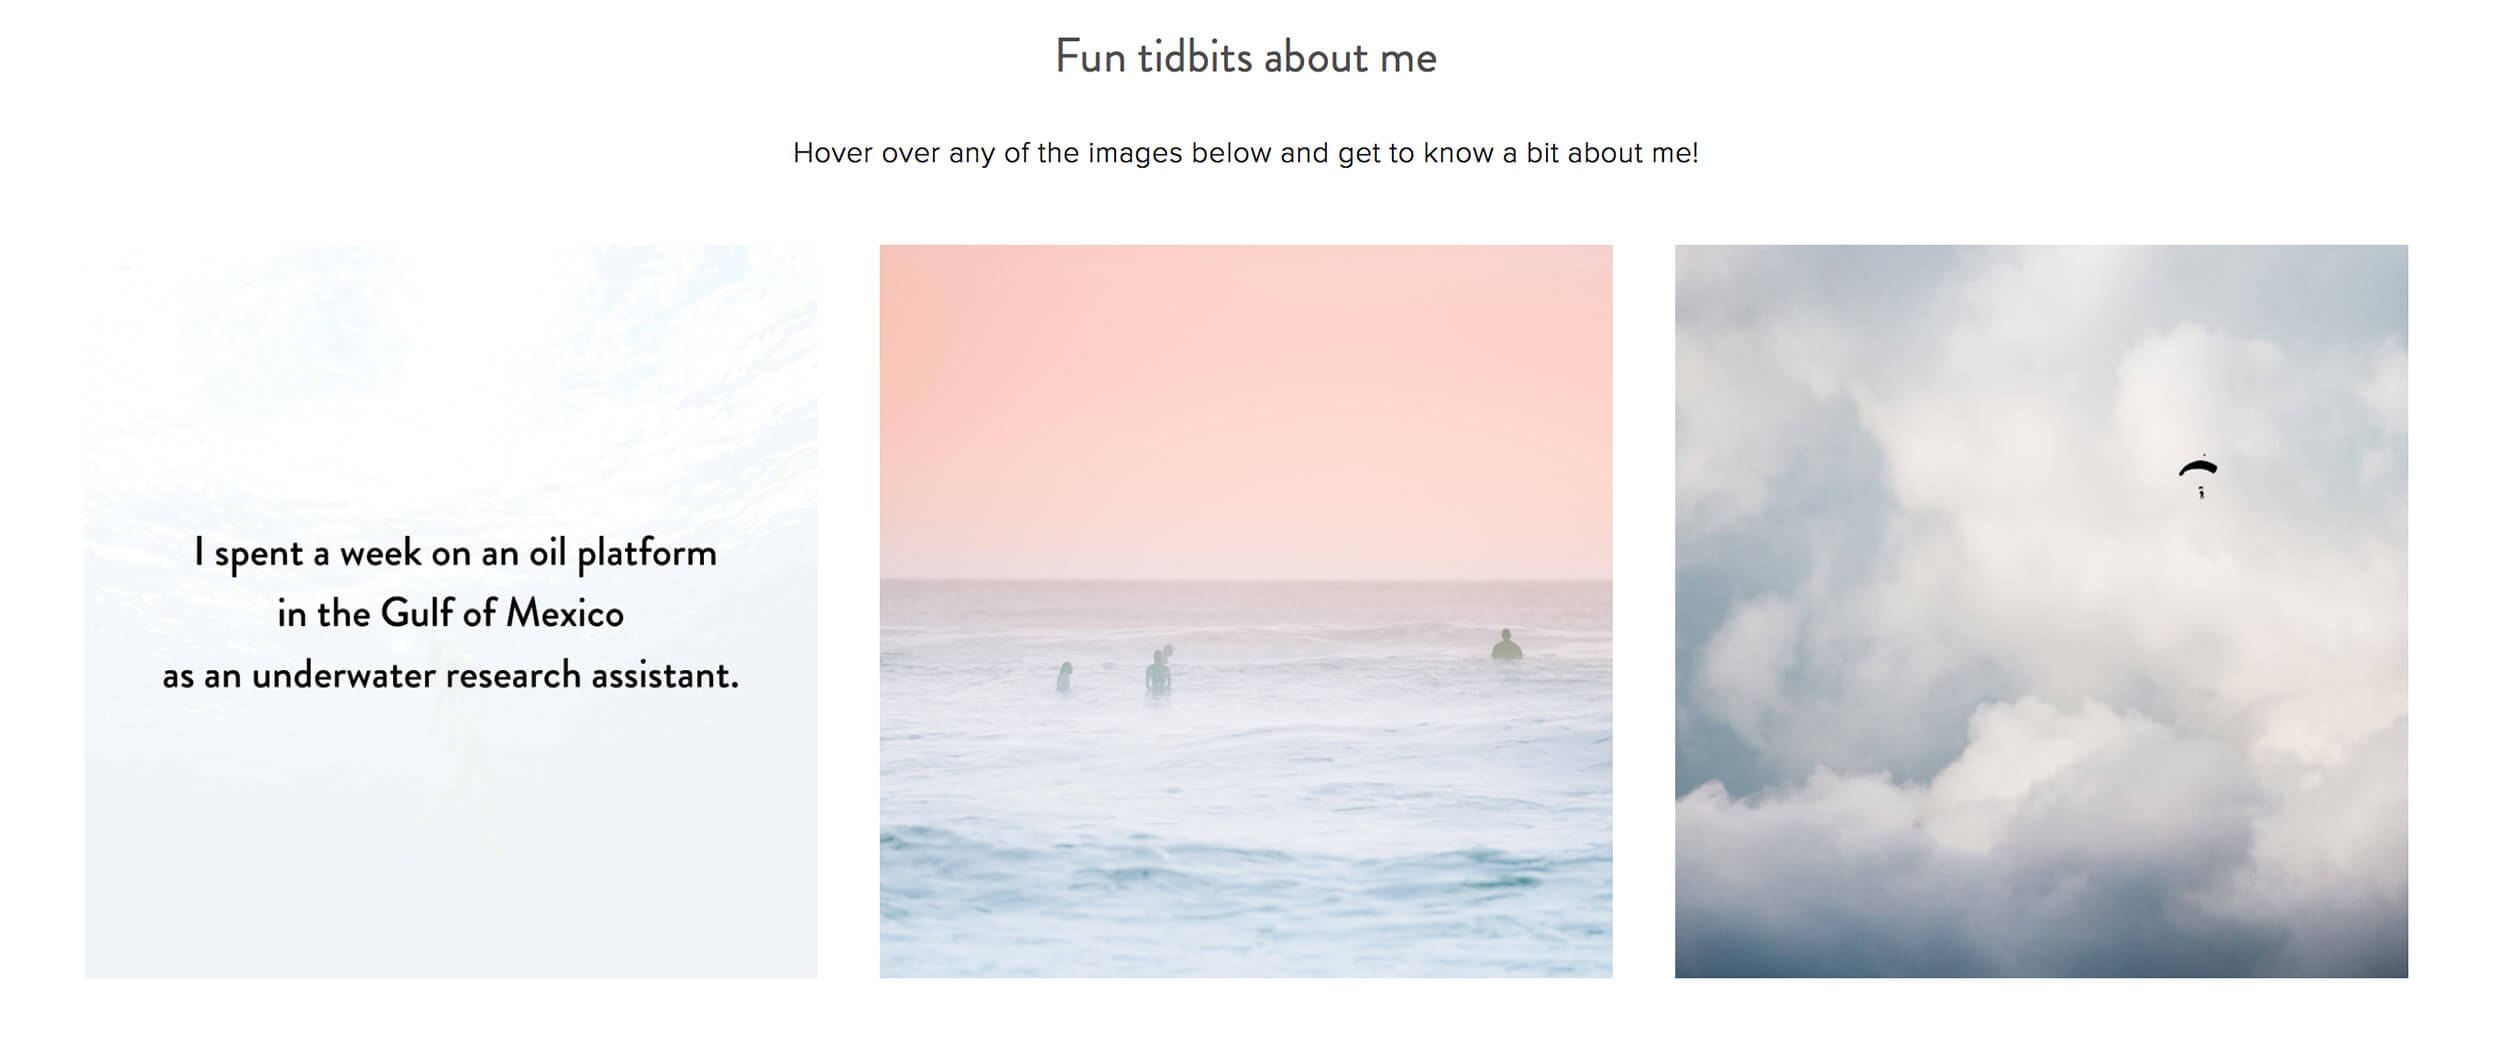
VIEW when hovering on top left image
Interested to learn how to create your own hover effect images? Check out this post on how you can create your own fun image grid with hover effects in Squarespace!